Before the first class
Getting started
Over the course of the semester/reading this book, our (ambitious) goals are to
- convince you statistics and data science are a vital component of biological, ecological, evolutionary, and medical research
- help you understand the concepts and linkages among basic tests, so you know what they are and when to use each
- for undergrad students, that means getting right answers on exams. For graduates, this means you’ll know how to make decisions about your data and communicate/discuss/defend them when talking to advisors and reviewers
- introduce you to tools that are commonly used in the field (and will add to your CV) including R (through Rstudio), git, and markdown.
- make you aware that the skills you learn in this class open the door to other careers!
To prepare for our first few lessons you should follow the basic steps below. Much of this is repeated and expanded in the tools overview.
Concept stuff
- Check out the class website
- Watch this video
Tech stuff
We will use R in class to “do” statistics. R is a free, open-source program that is widely used in academia and industry (learning it is a CV or resume skill). It is command-line based, which may be different if you are used to point-and-click programs (graphical user interfaces), but that allows it to be easily saved and shared. We will also store R and related files in multiple places using a process called version control; specifically, we will use github to accomplish this.
- Get access to R!. You can make an account at posit Cloud (formerly Rstudio Cloud) (https://posit.cloud/). You can also install R (https://cran.r-project.org/) and Rstudio (https://www.rstudio.com/) on your machine, but I strongly recommend starting with Posit cloud. Rstudio cloud is free for up to 25 hours/month, you don’t have to maintain it, and it gives gives a standard install (same on all machines, so your intro/ our training may be smoother). You can also do both. If you need help, videos are at :
- Join the github classroom we’ll be using for our sessions
- look for email from Blackboard!
- When you visit the page it will ask you to connect or create a github repository. You can use any name (be anonymous or not) that you want. This is a free process.
Optional (get a head start if you want)
Video at Accepting a github classroom assignment and cloning to posit cloud**
After you join the github classroom, you’ll make a clone of the first assignment repository. You can do this on Positcloud or an installed version of Rstudio. I recommend starting with posit Cloud and focus on that process here. First, open Posticloud in one tab/window on your browser (and log in). Next, open github on another tab/window.
Then, find your copy of the repository on github. You can follow the github classroom link again, or log into github and then visit https://github.com/settings/repositories. Find the repository connected to the assignment. You can go to go to https://github.com/settings/repositories to look for it (you’ll need to sign in to github). For github classroom assignments, the repository will be called assignment_name_YOURGITHUBUSERNAME. Click on it to open the repository page.

This will take you to your repository page. This is a also a chance to note you may want to sync the fork - this catches your copy up to any changes I have made in the assignments or associated files.
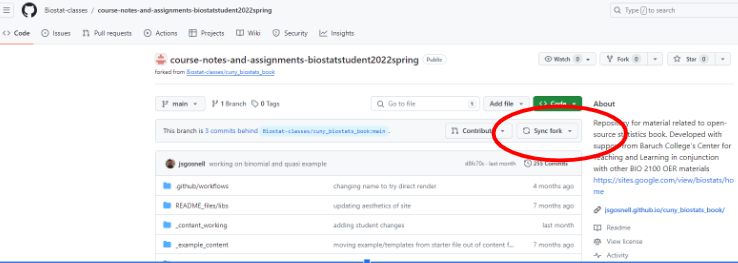
What’s the difference between clone and fork? Click on the grey triangle
A clone of repository is directly linked up to the original repository. Changes made in one will be pushed or pulled to the others. A fork is different in that it can’t directly communicate. Instead, changes can be synced up using pull requests. github also makes it easy to sync them using the button shown above. Github classroom forks the assignments for each of you, then you makes clones of the forks to work on posit Cloud or your machines.
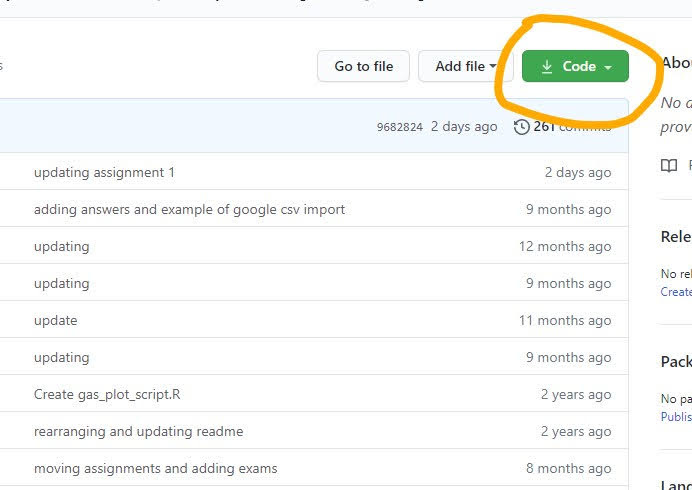
From the repository page, you need to get the url to copy (or clone) the repository. To do this, click on the green Code button from the github page for your repository. Copy the web url (or click the copy icon, two overlapping squares).
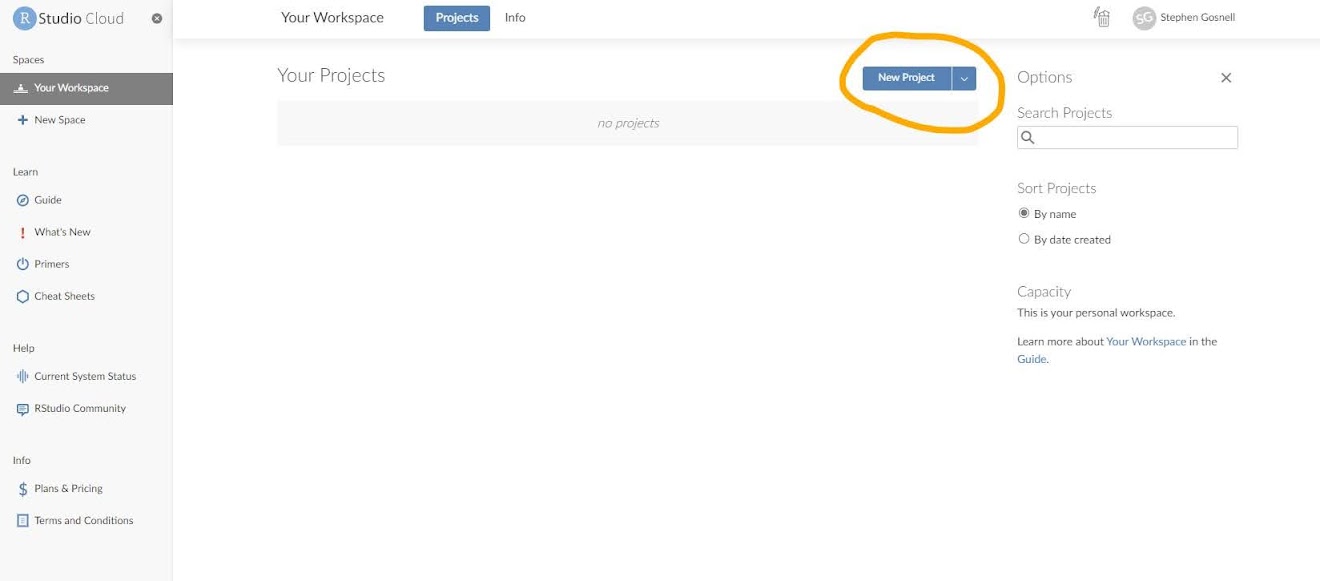
Now go to the PositCloud tab. Select New Project, New Project from Github repo. You’ll need to enter the url for your github repository (what you copied). Press enter and the project will deploy.
The next screen will bring you to a “normal” RStudio screen. We’ll come back to this in the first class or two!
If you are using RStudio on your desktop (or via a server…anywhere that
looks like an RStudio screen)
Video at Accepting your first github repository (from github classroom) and cloning to Rstudio desktop
To start working on an assignment, open RStudio.
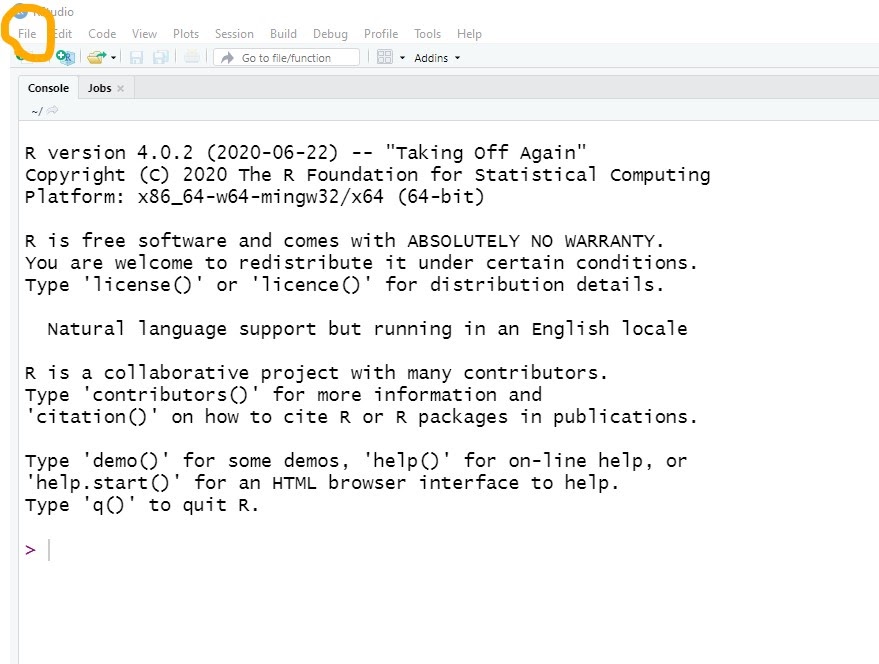
Select file, new project, Version control. On the next screen select git. If this isn’t available, you may need to install git (free) on your system. You can download it at https://git-scm.com/download/.
Next you’ll need to enter the url for your repository. To find this, click on the Code button from the github page for your repository.
Copy the web url (or click the copy icon). Input that into the Rstudio Repository URL space. You can select/edit what you want the repository to be called and where its stored (its just a folder on your computer). For example, I have a Repositories folder in my main hard drive where I save all of these. Then select Create project. Whatever you choose, the project will be saved in new folder in that location using the name you chose. Note you may need to enter your github username and password to create the repository.
You also may get an error/warning about personal access token! this happens at different points on different machines (thus why Rstudio cloud is nice). If you see this now, don’t worry. We’ll cover it (a known issue) in class.
The next screen will bring you to a “normal” RStudio screen. We’ll come back to this in the first class or two!